

Connecting a database to an HTML form can be a hectic task if you are a beginner.
The database allows you to capture and store user information effectively.
Whether you're building a registration form, a contact form, or any other type requiring user input, integrating it with a database is crucial for data management and retrieval.
In this step-by-step guide, we will walk you through the process of connecting a database to an HTML form.
By following these instructions, you'll be able to store and retrieve user data efficiently.
So let's get started!
Creating the Folder in Xampp
If you are using XAMPP as your local development environment, then you need to follow these steps to create a folder.
Locate the XAMPP installation directory on your computer. By default, it is usually located in the "C:\xampp" folder on Windows or "/Applications/XAMPP" on macOS.
Open the XAMPP installation directory and navigate to the "htdocs" folder. This is the root directory where you need to create your web projects.
Create the new folder inside "htdocs" folder.
Enter a name for your new folder. Choose a descriptive name that represents your project or website.
After creating the folder, you need to create 2x files inside that folder.
Create an HTML file with any name, In my case I created with the 'form.html' and now create a PHP file in the same folder named 'submit.php' or any other name you want.
For now, that's it. Congrats!
Creating a Folder in WampServer
If you are using WampServer as your local development environment, creating a folder is a simple process. Follow the steps below to create a new folder within your WampServer installation directory:
Locate the WampServer installation directory on your computer. By default, it is usually located in the "C:\wamp" folder on Windows.
Open the WampServer installation directory and navigate to the "www" folder. This is the root directory where you can create your web projects.
Create the new folder inside "www" folder. Follow steps 4 and 5 from above section of "Create a folder in Xampp".
Now you can proceed to create HTML and PHP files inside the newly created folder. Simply create an HTML file with any desired name, such as "form.html", and a PHP file with a name like "submit.php" or any other suitable name for your project.
Note: It's important to note that any files or folders placed within the "htdocs" or "www" directory will be accessible through your local web server. To view your web project in a web browser, you will need to access it using the appropriate URL, such as "localhost/your-folder-name/filename".
Create a Simple HTML Form
I assume you know how to create an HTML form, if not you can follow this guide: HTML Forms by W3School!
<!DOCTYPE html>
<html>
<head>
  <title>Registration Form</title>
</head>
<body>
  <h1>Registration Form</h1>
  <form action="process_form.php" method="POST">
    <input type="text" name="id">
<input type="text" name="name">
<input type="password" name="password">
<input type="radio" name="male" value="male"> Male
<input type="radio" name="male" value="female"> Female
<input type="text" name="email">
<input type="text" name="phone">


    <input type="submit" value="Submit">
  </form>
</body>
</html>
Creating Database and Table in MySQL
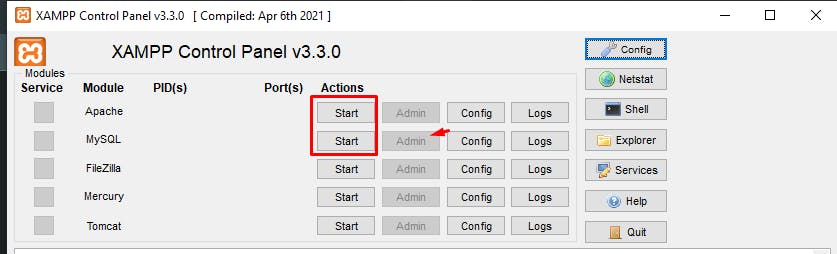
If you are using Xampp, just click on start button of Apache and MySQL, and then click on admin of MySQL to open the My SQL.
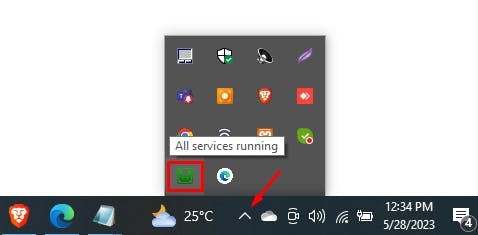
If you are using WampServer, then start wampserver, if you do not know how to access it just click on this arrow at the bottom right as shown in image.
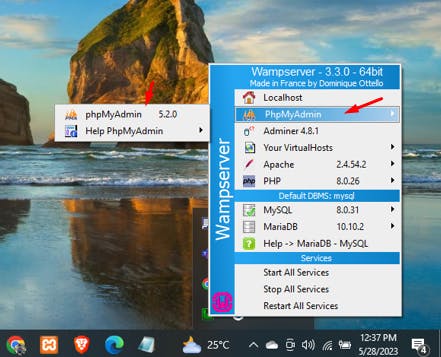
Now click on phpMyadmin.
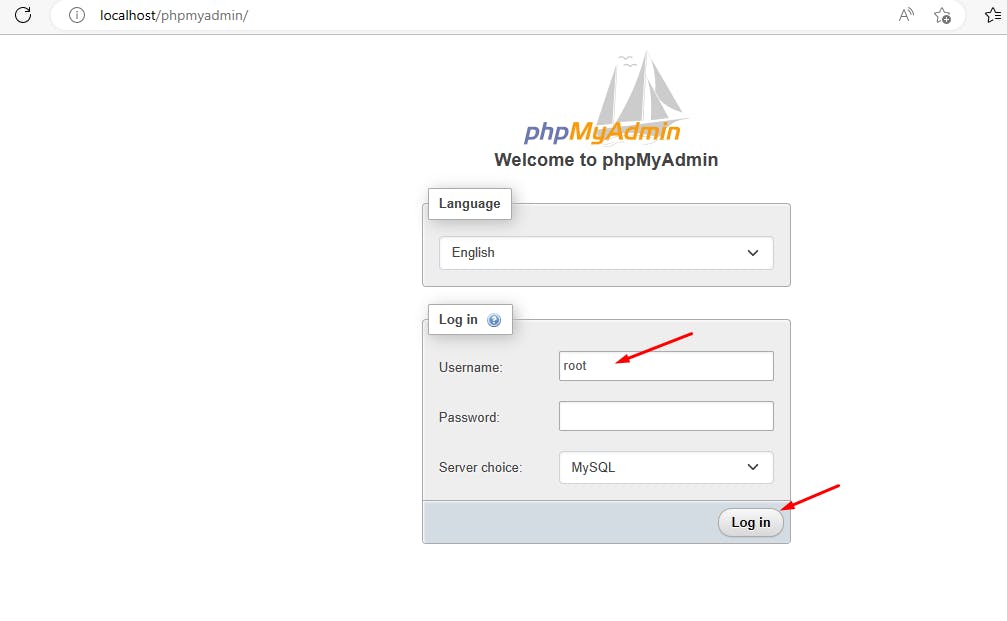
Just type user name as root and hit sign button.
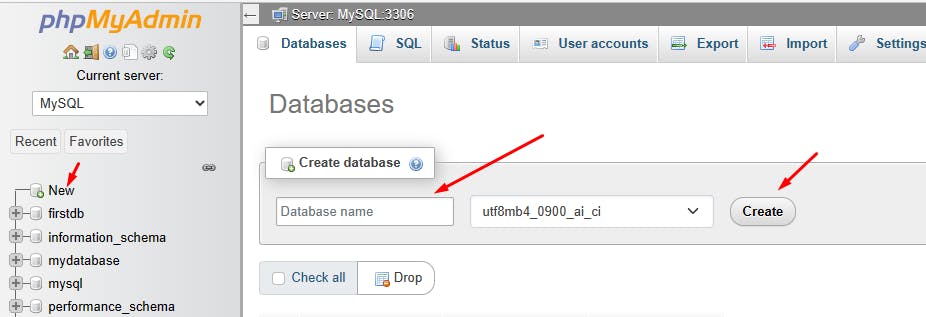
To create a database and table in MySQL, follow these simple steps:
Open your preferred MySQL client, such as phpMyAdmin or MySQL Workbench.
Connect to your MySQL server using the appropriate credentials (username and password).
Once connected, locate the "SQL" or "Query" tab where you can execute SQL statements.
To create a database, use the following image:
Now, you can create a table within the database. Here's an example of a SQL statement to create a table:
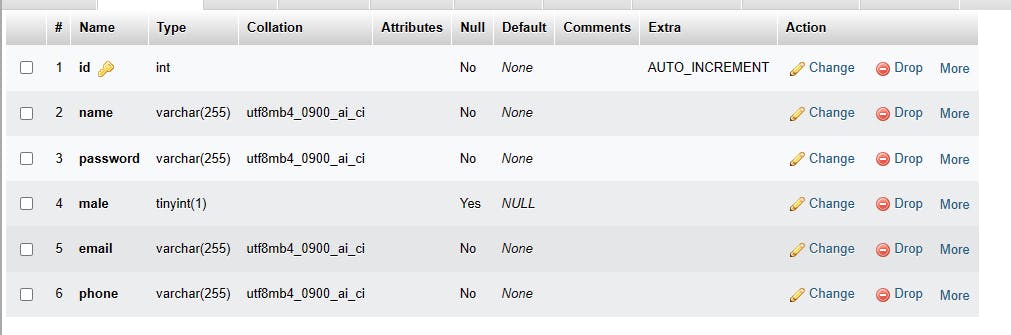
Modify the column names and data types according to your requirements.
Execute the SQL statement to create the table. You should see a success message confirming the creation.
OR you can use this SQL query:
CREATE TABLE users ( id INT AUTO_INCREMENT PRIMARY KEY, name VARCHAR(50) NOT NULL, password VARCHAR(50) NOT NULL, gender VARCHAR(10) NOT NULL, email VARCHAR(100) NOT NULL, phone VARCHAR(20) NOT NULL );

Creating PHP Script
The code starts by retrieving the data sent via the POST request using the $_POST superglobal. The variables $id, $name, $password, $male, $email, and $phone are assigned the corresponding values from the POST data.
Then, it establishes a connection to the MySQL database using the mysqli extension. The connection parameters (server name, username, password, and database name) are provided.
After establishing the connection, it checks whether the connection was successful. If there is an error, the script terminates and displays an error message using the die() function.
If the connection is successful, the script continues to construct an SQL INSERT statement. The statement will insert the data from the variables into the "users" table. It uses the VALUES clause to specify the values to be inserted. Note that the variables are directly injected into the SQL query, which can be a security risk. It's recommended to use prepared statements or proper sanitization techniques to prevent SQL injection attacks.
The SQL query is executed by calling the query() method on the $conn object, and the result is stored in the $result variable.
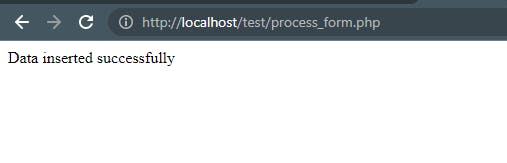
Next, the code checks if the query was successful by evaluating the $result variable. If it's true, the script echoes "Data inserted successfully." Otherwise, it displays an error message along with the specific error obtained from the connection object using the error property.
Finally, the connection to the database is closed using the close() method called on the $conn object.
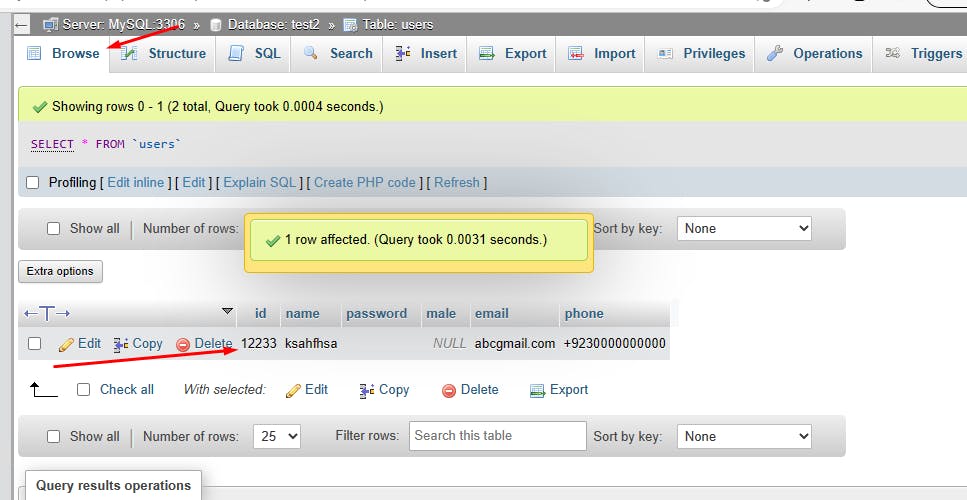
 <?php

 // Get the POST data
 $id = $_POST['id'];
 $name = $_POST['name'];
 $password = $_POST['password'];
 $male = $_POST['male'];
 $email = $_POST['email'];
 $phone = $_POST['phone'];

 // Connect to the database
 $servername = "localhost";
 $username = "root";
 $password = "";
 $database = "test2";

 $conn = new mysqli($servername, $username, $password, $database);

 // Check if the connection was successful
 if ($conn->connect_error) {
   die("Connection failed: " . $conn->connect_error);
 }

 // Insert the data into the database
 $sql = "INSERT INTO users (id, name, password, male, email, phone) VALUES ($id, '$name', '$password', $male, '$email', '$phone')";

 $result = $conn->query($sql);

 // Check if the query was successful
 if ($result) {
   echo "Data inserted successfully";
 } else {
   echo "Error inserting data: " . $conn->error;
 }

 // Close the connection
 $conn->close();

 ?>
Run your code and fill the form you will see, your data has been inserted into the database!
Thanks for reading this, if you face any problem, let me know in the comment section or contact me on LinkedIn.
LinkedIn: Daniyal Lodhi